since today is the day of luuuuvvvv, i thought i'd show y'all some lovin' and with a tutorial.
so first of all, i know that there are many pillowcase dress tutorials out there.
but i thought i'd go ahead and share my simple, figure-it-out-as-i-go method in case y'all want to try it.
if you are a seamstress or a perfectionist, quit reading now.
this is by no means the right way to do this, this is just my own personal super easy, sara-version. :)
also, this is a super simple dress that you could even do with iron-on hem tape if you don't sew.
i made this sweet little dress for ruby for valentine's day.
i bought 1/2 of a yard of the red dotty fabric from hobby lobby and i already had the ribbon and fabric for the hearts.
i just eye balled how much fabric i'd need by holding it up to ruby in the store.
you can also take a dress that you have that is the right size and gauge your fabric that way.
or google pillowcase dress sizing.
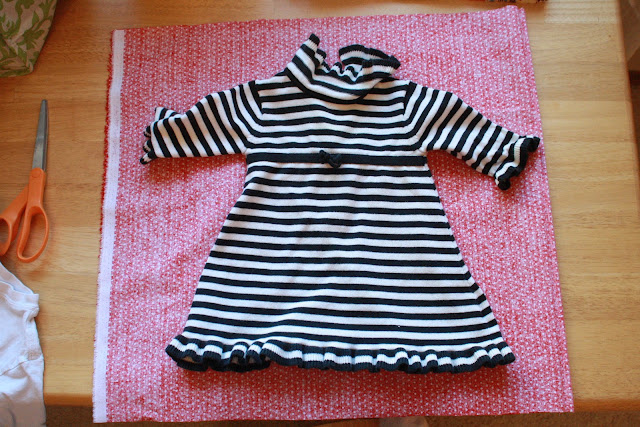
first, i folded my piece of fabric in half width-wise and laid a dress of ruby's down to get an idea for the length of the dress.
next, i decided how long i wanted it to be, and added about 6 inches for seam allowance and the ribbon casing. then i cut off the excess.
then, i trimmed up the top and bottom edges to make sure they were straight(ish).
next, i lined up the selvages.
i used the full width of the fabric for this dress {half for the front and half for the back} because i wanted it to be full when i gathered it up with the ribbon.
but if you want it more straight and less full, this is where you would trim some fabric from the width.
it does not have to be perfect, this dress is very forgiving.
next, {with the fabric still folded and right sides facing each other} i sewed a straight seam along that selvage edge, being sure not to leave any white edge showing.
i cut off the excess and sewed a zigzag stitch along that edge to keep it from fraying.
then, i folded the bottom edge up 1/4 of an inch {ish} and then up again and pinned it.
i sewed that edge to make the bottom hem.
next, the arm holes.
i folded the fabric in half again width wise.
i looked at my example dress to get an idea of the size for the arm holes.
i made a little snip with my scissors to mark then spot first.
then, i made a curved, j-shaped cut for the armholes {you are cutting through 4 layers of fabric at this point}.
again, this does not have to be perfect.
just give it your best shot. :)
then, i unfolded the fabric and used some pink grosgrain ribbon that i had on hand to finish the edges of the arm holes.
the ribbon i had was 7/8 inch and i folded it in half over the edge and stitched it in place.
next, i made the ribbon casing.
i folded the top over 1/4 " and then another inch and stitched that down, close to the folded edge.
then, i took some more of that pink ribbon and cut two lengths that were each twice as long as the width of the dress.
i pinned one edge with a safety pin and worked it through the casing. same with the other one.
then i stitched a little straight stitch in the middle to keep the ribbon from slipping out.
then, i just cinched up the ribbons to gather the top and tied them in bows on each side.
make sense?
to make the dress valentiney, i cut some scrap fabrics into heart shapes and stitched them on.
i left the edges raw because i like the look of the frayed fabric edge.
i purposefully sewed it around and around and kind of wonky. :)
this was a really simple and inexpensive dress to make....and i love how it turned out.
ruby received many compliments on sunday. :)
our little valentine. :)
so i know this tutorial was very basic.
i wanted to make sure even non-sewers could do it.
let me know if you have any questions.
i'm thinking of making a modified version for me. :)
Pin It


This is fantastic! ( found you on pinterest!) I am a quilter and have 2 little girls (ages 2 and 5) and I have so much fabric, I think I could make them a different dress for everyday of the year!! Thank you for sharing!
ReplyDeleteLove her new outfit! Hows the blanket going for you?
ReplyDeletejust 1/4 yard fabric? I need a girl in my life. (who doesn't already have an uber-talented mother.)
ReplyDeleteAwesome. Its more love than creativity
ReplyDeleteQuick, simple and cute. I love it, thanks!
ReplyDelete